

- Enhanced features: Add persistence, streaming, short and long-term memory and more to your AutoGen agents.
- Multi-agent systems: Build multi-agent systems where individual agents are built with different frameworks.
- Production deployment: Deploy your integrated solution to LangSmith for scalable production use.
Prerequisites
- Python 3.9+
- Autogen:
pip install autogen - LangGraph:
pip install langgraph - OpenAI API key
Setup
Set your your environment:1. Define AutoGen agent
Create an AutoGen agent that can execute code. This example is adapted from AutoGen’s official tutorials:2. Create the graph
We will now create a LangGraph chatbot graph that calls AutoGen agent.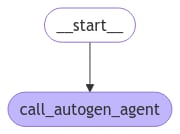
3. Test the graph locally
Before deploying to LangSmith, you can test the graph locally:4. Prepare for deployment
To deploy to LangSmith, create a file structure like the following:- agent.py
- requirements.txt
- langgraph.json